Close Menu
    Facebook Instagram YouTube X (Twitter)
    Vistek ProPhotoBlog
    • Home Page
    • Gear
      • Cameras
      • Photo & Video Lenses
      • Aerial Imaging Platforms
      • Lighting
      • Photo and Video Accessories
    • Reviews
    • Learn
    • Community
      • Vistek Online Photo Gallery
      • Past Events
      • Interviews
    • ProFusion Expo
    • Events
    • Videos
    Vistek ProPhotoBlog
    Learning

    One Man Band Audio | Vistek 60 Second Set-up Video

    Woodrow WaldenBy Woodrow WaldenMarch 23, 2016Updated:February 22, 2018No Comments2 Mins Read
    One Man Band Audio Set-up

    The 60 Second Set-up Series

    Let’s face it, some products can be frustrating to set-up right out of the box (a certain Swedish company comes to mind), so we designed this series to show you, in 60 seconds or less, how to properly set-up various products available at Vistek. In this video, we demonstrate a “one man band” audio set-up using a boom mic, c-stand and audio boom pole.


    ONE MAN BAND BOOM MIC: Detailed Setup Instructions

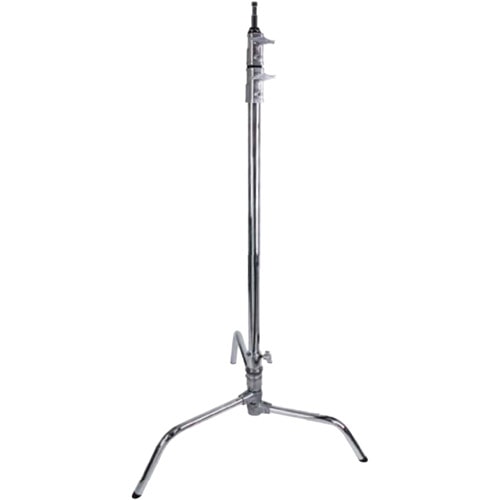
    1. Set up a solid stand like a c-stand or a solid double 750 stand.
    2. Place a sandbag on the stand.
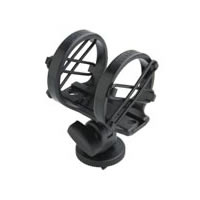
    3. Locate the smallest slot on the grip head. Loosen grip head knuckle and place the Ikan Audio Boom Cradle Mount into the receiving slot and tighten the grip head knuckle.
    4. Attach the telescopic audio boom pole to the shock mount
    5. Thread the hyper-cardioid microphone through the shock mount
    6. Attach the xlr audio cable to the microphone
    7. Extend the audio boom pole the necessary amount to your interviewee while keeping the stand out of the camera frame.
    8. Install the audio boom pole into the Ikan Boom Cradle Mount, with more than 50% of the weight balanced on the microphone end.
    9. Clean up the audio cable by looping it around the cradle mount and a couple additional turns around the boom pole itself.
    10. Raise the stand using the top riser to the necessary height. Pay close attention to the angle and axis of the cardioid mic and keeping it as close to subject’s mouth without it entering into the camera frame. Often this means that the microphone is placed about one foot in front of the subject, and angled back towards the direction of their mouth.
    One Man Band Boom Pole
    K-Tek KE-69 Boom Pole
    One Man Band C-Stand
    Kupo CT-20M C-Stand
    One Man Band Shotgun Mic
    Sennheiser ME66 – K6 Shotgun Mic
    Rode SM3 Hot Shoe Mount

    Products featured in this 60 Second Set-up:

    • Ikan Audio Boom Cradle Mount
    • K-Tek KE-69 5’9″ Aluminum Boom Pole
    • Sennheiser ME66 – K6 Shotgun Mic Kit
    • Rode Microphones SM3 Hot Shoe Shock Mount
    • Digiflex 25′ Mic Cable – XLRF-XLRM
    • Kupo CT-20M Master 20″ C Stand w/Turtle Base, Chrome Finish
    • Tenba Heavy 10 – Sandbag


    Post Views: 1,322
    Share. Facebook Twitter LinkedIn Email
    Previous ArticleElinchrom launches new EL-Skyport Plus System & ELB400 Sets
    Next Article Greenland Exposed: A Photographic Adventure with Paul Zizka

    Related Posts

    Photographing Shadows: Playing with light and dark.

    June 27, 2025

    Architectural Photography: Tips for capturing the soul of a structure

    June 27, 2025

    Lens Testing Masterclass – Unlocking the Secrets of Camera Optics

    March 6, 2025

    Leave a ReplyCancel reply

    This site uses Akismet to reduce spam. Learn how your comment data is processed.

    Feedspot Top 100 Canadian Photo Blogs
    Canadian Photography Blogs
    Subscribe to Blog via Email

    Enter your email address to subscribe to this blog and receive notifications of new posts by email.

    Follow Us On Social
    • Facebook
    • Twitter
    • Instagram
    • YouTube
    Facebook X (Twitter) Instagram YouTube LinkedIn
    Copyright ©2025 Vistek Ltd. All Rights Reserved.

    Type above and press Enter to search. Press Esc to cancel.